How to Safety Wire (Lockwire) Correctly
Safety wire (lockwire) positively locks fasteners so they cannot vibrate loose. The whole trick is one idea: the wire must always be in tension in the direction that tightens the fastener. Here is the double-twist method the way it is done to the aircraft standard — and the mistakes that fail an inspection.

- 7 steps
- What you'll need, listed
- No paid placements
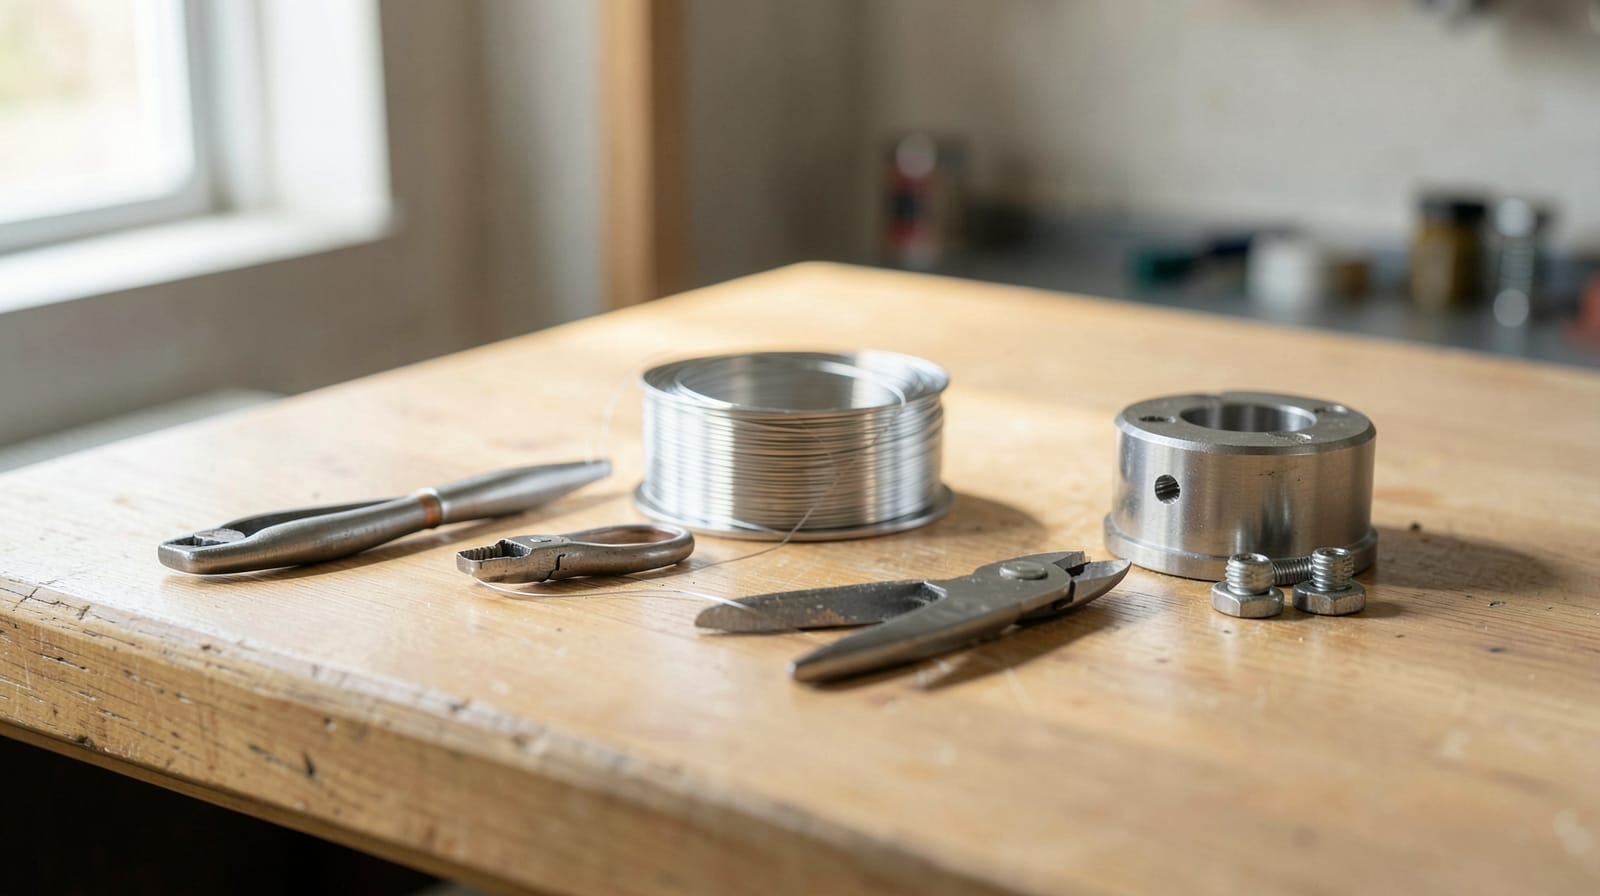
Safety wire does not tighten anything — it stops a fastener that is already torqued to spec from backing out. So torque first, then lockwire.
This is the general double-twist method. On aircraft you always safety-wire to the applicable drawing or specification; recognized methods are set out in FAA AC 43.13-1B. Follow the spec for your application.
- See our picksSafety-wire pliers
A reversible plier, ideally with automatic return, for even twists in either direction and a clean pigtail cut.
- See our picksStainless safety wire
Fresh wire in the gauge your specification calls for, kept straight on its spool or in a dispenser.
- Diagonal cutters
Sharp, flush-cutting diagonals for trimming ends and cutting out old runs without nicking the fastener or part.
- See our picksCalibrated torque wrench
Every fastener is torqued to specification before it is wired; the wrench sets the torque, the wire only keeps it.
- Inspection light and mirror
For checking routing and pigtails on the far side of a run, where a slack leg or proud end is easy to miss.
- Clippings container
A small cup or bag for cut ends and removed wire, so every offcut is accounted for instead of left as FOD.
How to safety wire, step by step
Gather the right materials
You need stainless safety wire in the correct gauge for the job (0.032 in is common for general work; a lighter gauge such as 0.020 in for small or light fasteners — follow the spec), a pair of reversible, automatic-return safety-wire pliers, and diagonal cutters.
Confirm every fastener is already torqued to specification. Safety wire secures; it does not set torque.
Find each fastener's tightening direction
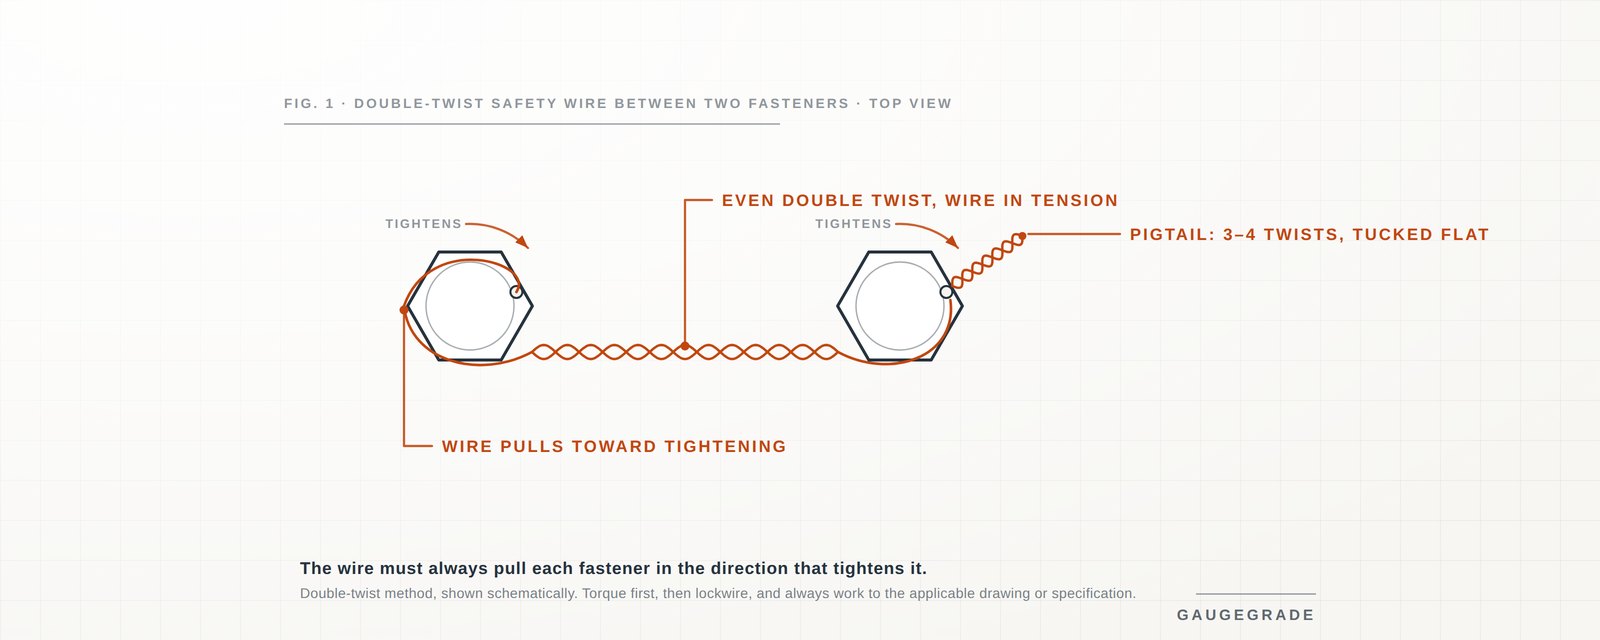
Before routing anything, note which way each fastener tightens. Everything that follows exists to make the wire pull each fastener toward tightening, never toward loosening.
Anchor and route the first leg
Feed the wire through the hole in the first fastener and route the strand so that, when it is under tension, it pulls that fastener in the tightening direction. Keep the wire snug against the part and do not let it kink or get nicked.
Twist the connecting leg
Grip both strands with the pliers and twist them evenly toward the second fastener, keeping tension on the wire. Aim for a consistent twist rate for your wire gauge (follow the spec — it is on the order of a several twists per inch, even and uniform).
Do not overtwist, which work-hardens and cracks the wire, or undertwist, which leaves it slack.
Secure the second fastener
Pass a strand through the hole in the second fastener and route it so that it, too, is pulled toward tightening. The twisted wire between the two fasteners stays in tension the whole way.
Terminate with a pigtail
Finish with a short twisted pigtail — roughly three to four twists, about a quarter to half an inch — and cut it clean. Bend the pigtail back and tuck it flat against the part so it cannot snag a hand, a glove or, on an aircraft, become foreign object debris (FOD).
Pull-test and inspect
Check every leg: the wire is tight, each fastener is pulled toward tightening, nothing can back out, and no sharp end is left standing proud. If a leg is slack or routed the wrong way, cut it out and redo it — do not reuse the wire.
The rules that never change
Whatever the fastener, these hold:
- The wire is always in tension, in the direction that tightens the fastener.
- Never reuse safety wire — once twisted it is work-hardened and will crack.
- Never nick, kink or scratch the wire; it fails at the damage.
- Match the wire gauge to the job and the spec.
- Keep the twist rate even and the runs neat.
Mistakes that fail an inspection
Almost every rejected safety-wire job comes down to one of these:
- Routing the wire so it would let the fastener loosen — the single most common error.
- Slack, kinked or nicked wire.
- Over- or under-twisting, or an uneven twist rate.
- A sharp pigtail left proud instead of tucked — a FOD and injury hazard.
- Wrong wire gauge, or reused wire.
How to use safety wire pliers
The pliers do one job: hold both strands and spin them evenly. Everything else is your routing.
Pull the knob at the end of the handle back to unlock the twist rod, then open the jaws and take both strands close to where the twist should start. Squeeze the handles until the jaws lock onto the wire — most twisters latch, so the tool holds the wire without you gripping it.
Set the direction before you pull. A reversible plier has a sleeve or switch that selects clockwise or counter-clockwise; on the flight line you pick the one that lays the twist the way the routing needs it, not whichever way the tool happens to be set.
Keep a light pull on the tool so the wire stays in tension, then draw the knob out smoothly. The rod spins and twists both strands together. Let it return, and if the run needs more twists, take a fresh bite and repeat rather than over-spinning one grip.
Release the latch to open the jaws. Count the result rather than trusting feel: the twist rate has to match the spec for your gauge, and an even rate over the whole leg is what an inspection looks for.
Two habits worth forming. Never twist an unsupported span you have not tensioned first, because a slack strand coils instead of twisting. And keep the cutter for the pigtail — trimming mid-run leaves a cut end where the wire is already work-hardened.
Single vs double twist, and the pliers
The double-twist method above is the standard for most pairs of fasteners. A single-strand (single-wire) method is used in specific close-spaced or restricted cases, per the applicable drawing.
You can twist by hand, but it is slow and inconsistent. Reversible, automatic-return safety-wire pliers make even, repeatable twists and let you set clockwise or counter-clockwise — which is why they are standard shop kit.
Plan the run before you cut any wire
Most rework starts before the wire does. With every fastener torqued, look at the whole group and decide which fastener anchors the run and which way each one tightens, then trace the path the wire will take so every leg pulls toward tightening. If you cannot make every leg do that, change the order or the anchor point rather than forcing the route.
Check hole position next. The safety-wire hole should sit where the wire can pull the fastener toward tightening. If it does not line up, never loosen the fastener or go past its maximum torque to bring the hole around. Tighten further within the specified torque range to align it, and if the hole still will not line up, follow the maintenance data for the fix rather than improvising one.
Then cut a length long enough to complete the whole run and still leave plenty to grip when you form the pigtail. A run that comes up short cannot be spliced or patched; it has to be cut out and redone with fresh wire. The same goes for a length you kink while routing. Do not try to straighten it; start again with a new piece.
Removing old safety wire
Safety wire has to come off before a fastener can be loosened, and careless removal can damage parts you are about to put back in service.
Cut the wire where you can reach it cleanly, usually through the twisted section between fasteners, using sharp diagonal cutters. Keep the cutter jaws off the fastener head and the surrounding surface; a nick in a bolt head or a gouge in a housing is damage, and on aircraft it may need assessing before the part is reused.
Draw each piece out of its hole along the path it went in, using pliers, rather than prying it out with a screwdriver against the part. If a piece resists, there is usually a bent end or kink still in the hole; straighten the exposed end or trim it closer, then pull again.
Collect every piece as you go and count them against the number of legs you cut. Loose clippings are FOD in an engine bay or airframe, and they are just as good at jamming a chain or a linkage on a motorcycle. Check that each wire hole is clear before you rewire, and throw all removed wire away: it is work-hardened and is never reused.
This is general practice, not a substitute for the aircraft's approved maintenance data or an A&P mechanic's inspection and sign-off.
- Aeronautics diploma
- Engineering degree
- BAMEC (DGCA)
- QC-trained
- ~2 yrs tool management
Why you should trust us
SK Kutubuddin, a former aviation professional with over two decades of hands-on experience, safety-wired and inspected fasteners as routine work throughout his years in aircraft maintenance. He holds a diploma in mechanical engineering (aeronautics), an engineering degree, a BAMEC and a qualification in aviation fuels and lubricants. This guide is the method as he practiced and inspected it on the flight line: wire in tension toward tightening, an even twist, and a pigtail tucked out of harm's way, every run.
The procedure follows the general practice set out in FAA AC 43.13-1B, the FAA's reference on acceptable methods, techniques and practices for aircraft inspection and repair, and it is written to agree with that guidance rather than replace it. Where a detail varies by application, such as wire gauge or twist rate, we point you to the specification instead of inventing a number. Where a tool below links to a review, that pick was chosen by the method on our How We Test page.
Frequently asked questions
Which way should safety wire be routed?
Always so that the wire, under tension, pulls each fastener in the direction that tightens it. If the routing would let a fastener rotate loose, it is wrong — cut it out and redo it.
What gauge safety wire should I use?
0.032 in stainless is common for general work; lighter fasteners may call for a thinner gauge such as 0.020 in. Follow the specification for your application.
Can I reuse safety wire?
No. Once wire has been twisted it is work-hardened and prone to cracking. Always use fresh wire.
Single-twist or double-twist?
Double-twist is the standard for most fastener pairs. The single-strand method is used only in specific close-spaced or restricted situations called out by the drawing.
Do I need special pliers to safety wire?
Safety-wire (lockwire) pliers with a reversible, automatic-return action make consistent twists and are standard for the job. You can twist by hand, but it is slower and far less uniform.
How tight should safety wire be?
Snug and in tension, with no slack in any leg, but not so tight that normal handling or vibration could break it. A correct run holds each fastener toward tightening without the wire being overstressed or pulled hard over sharp edges. Your specification and inspector have the final say.
Why does my safety wire keep breaking while I twist it?
Usually overtwisting, a nick from burred plier jaws, or a kink put in while routing. Overtwisting work-hardens the wire until it cracks. Ease off the twist, check the jaws for burrs, and start again with a fresh length; never splice or reuse the broken piece.
Can I use safety wire and torque seal on the same fastener?
Yes, where the maintenance data or your shop procedure calls for it. They do different jobs: safety wire positively locks the fastener, while torque seal only shows whether it has moved. Neither replaces correct torque, which always comes first.
Related reading
- Aeronautics diploma
- Engineering degree
- BAMEC (DGCA)
- QC-trained
- ~2 yrs tool management
SK spent over two decades in aircraft maintenance, working hands-on with aero-engine systems and flight data recorder systems, borescope-inspecting turbine and compressor blades, and spending almost two years in a dedicated tool bay. He holds a diploma in mechanical engineering (aeronautics), an associate degree in science, an engineering degree and a Basic Aircraft Maintenance Engineer's Certificate (BAMEC) from DGCA, and has completed quality-control and aviation fuels & lubricants training. GaugeGrade applies the same inspection, torque and tool-management standards to the tools everyday mechanics, DIYers and trades actually buy.